
This guide focuses on “Muse Stripe Payment Links” and turns the question into practical steps you can check.
01 | Start with what the official demo actually shows
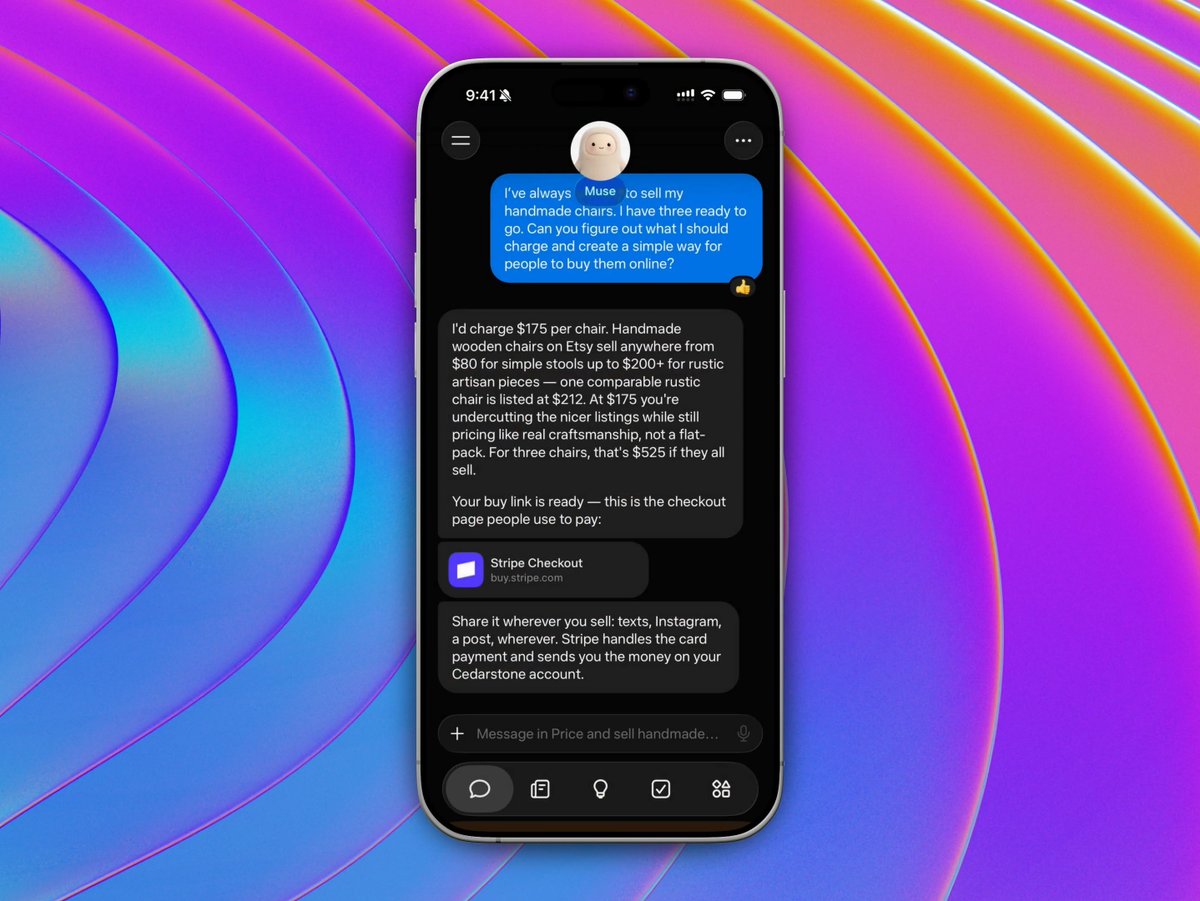
On September 30, Stripe posted a short Muse demonstration using handmade chairs. The conversation shows an example price, an action-confirmation step, and a checkout link. The locally hosted video below is expanded here with Stripe’s product, link, and payment documentation.
Decide your own product details first. The demonstration price is not a pricing recommendation, and a generated link does not establish the final customer total, available quantity, or delivery terms. MuseVIP has not tested a merchant account; check the tools and authorization actually available in your connection.
02 | Confirm merchant access and the environment
Check the Stripe merchant connector in your current Muse settings and confirm the business receiving payments. Meta’s business announcement names Stripe. Merchant payment work is distinct from connecting a personal Link wallet for your own purchases.
Open Stripe Dashboard and verify the selected account and environment. Sandboxes simulate payments; live mode serves real business. If Muse cannot access the required tool, use the official Payment Links Dashboard flow with the same reviewed information. Do not paste a real secret key into an ordinary task prompt.
Ask for a creation plan before allowing writes. Review the proposed product, price reference, and link. A confirmation shown in the official demonstration does not approve a different action in your account.
03 | Agree on the product and charging terms
Record the product name, accurate description, unit price, base currency, one-time or recurring charging, and what the customer receives. Keep undecided delivery or warranty terms unresolved. A single purchase and an automatically renewing subscription create different commitments.
If the correct product and price already exist, inspect their records and identifiers first. One product can have multiple prices, so its name alone does not identify the intended charge.
Stripe limits which fields can change on an existing Price. A new amount or billing interval generally requires a new price and an explicit reference from the new link. Do not treat a change to a new checkout as migration of existing subscriptions.
04 | Distinguish item quantity from completed checkouts
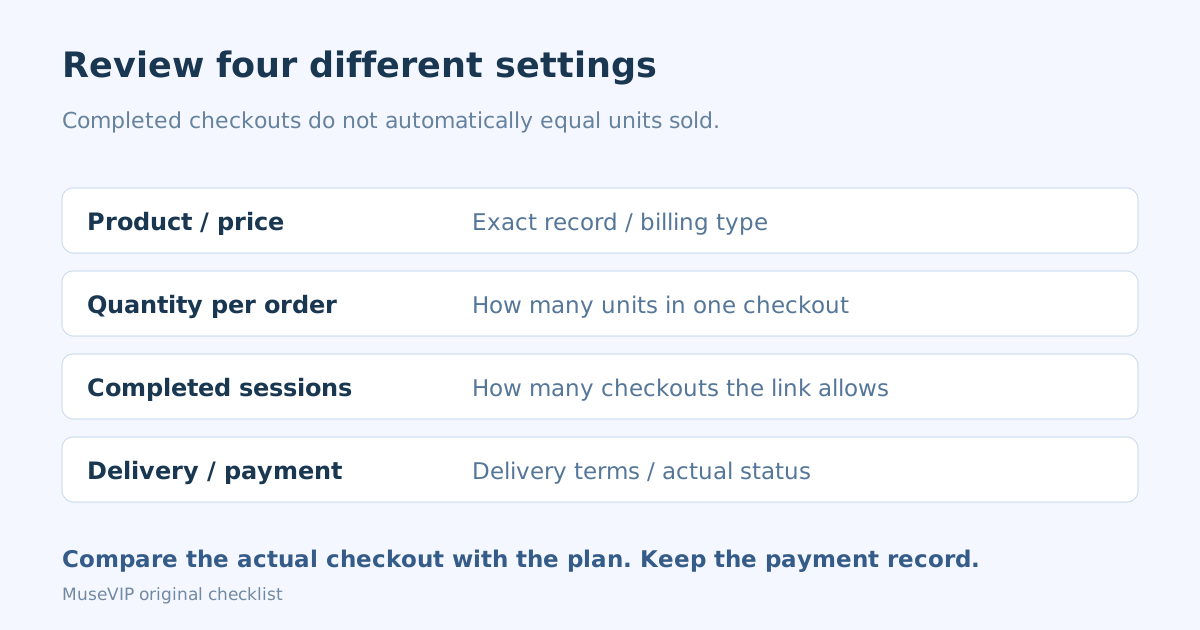
The demonstration mentions three available chairs. For limited inventory, specify both the quantity permitted in one order and the number of completed checkouts allowed through the link. Stripe supports adjustable quantities and completed-session limits, which control different things.
The link deactivates when its completion limit is reached. If one checkout can include several units, a limit of three completed checkouts does not manage inventory of three units. Review your real stock process and order quantities or control limited sales manually.
Add delivery or pickup, shipping charges, permitted destinations, tax treatment, and customer policies to the creation plan. Ask the responsible person to resolve missing terms before creating the live checkout.
05 | Review the plan, then approve one specific creation
Example request: Read the products and prices in this Stripe merchant account and propose a payment-link plan for this one product. List the account, environment, product and price identifiers, base currency, one-time or recurring charging, quantity settings, and delivery configuration. Preserve the approved copy. Ask about missing details. Do not create anything yet, change existing prices, send messages, or issue refunds.
After review, authorize one new payment link according to the approved plan and request its URL and associated records. Exclude customer sending and changes to other products, old links, or subscriptions. If the connector cannot create it, complete the same plan manually in Dashboard.
Creation writes to the merchant account. Stop if the proposed action differs from your plan. Afterward, inspect the new record and check that a retry did not create a duplicate link.
06 | Open the checkout a customer will actually see
Copy the link from Stripe Dashboard and open it yourself. Inspect the business name, description, quantity, payment choices, and final total. Confirm whether the page asks for one payment or recurring charges. If local-currency presentation appears, check that customer-facing amount too.
Check shipping or pickup information and all extra fields or fees. Correct unexpected terms and revisit the same link. A backend price by itself does not verify the whole checkout experience.
For simulated payment, use Stripe’s documented test values in a sandbox rather than a real card in live mode. If Muse cannot use that environment, test in Stripe directly. Record what was actually checked; do not report an unperformed test as passed.
07 | Share only the reviewed link
Stripe allows repeated sharing of a Payment Link and provides Dashboard QR-code generation. Save the final URL and customer explanation, then choose the recipients and publication location. Sending through Muse is a separate action with an exact recipient, message, and reviewed URL.
Scan a QR code before printing it. When the underlying link is deactivated, that QR code leads to an expiration page. If commercial terms are wrong, deactivate the link, handle existing publication locations, and decide whether to re-enable it.
Deactivating a link does not automatically refund earlier payments or resolve existing subscriptions. Inspect those records and authorize their actions separately.
08 | Verify the payment record before fulfillment
A page view, customer chat message, or thank-you redirect is insufficient evidence for fulfillment. Inspect the actual Stripe payment record, item, amount, customer-supplied details, and payment status. Delayed payment methods may remain in processing.
For a small operation, inspect Dashboard before manual fulfillment. For automated access or delivery, Stripe documents payment-event-driven handling, status checks, and protection against fulfilling the same Checkout Session twice. A landing-page redirect cannot provide complete payment verification.
Keep a record of the link, payment, status, fulfillment owner, and processing time. Continue with the <a href="/en/guides/muse-small-business-weekly-brief/">business weekly brief</a> for summaries or the <a href="/en/guides/muse-ads-ga4-reconciliation/">Ads and GA4 reconciliation guide</a> for attributed-order comparisons.
References
These sources support the product information in this guide. Musevip is an independent publication and is not affiliated with Meta.
- [1] Meta Muse business connector announcement
- [2] Stripe: Create a payment link
- [3] Stripe: Manage products and prices
- [4] Stripe: Customize checkout for Payment Links
- [5] Stripe: Share and deactivate links
- [6] Stripe: After a payment link payment
- [7] Stripe: Fulfill orders
- [8] Stripe: Test payments in a sandbox