

This guide focuses on “how to use Muse” and turns the question into practical steps you can check.
01 | Set response preferences and permission boundaries first
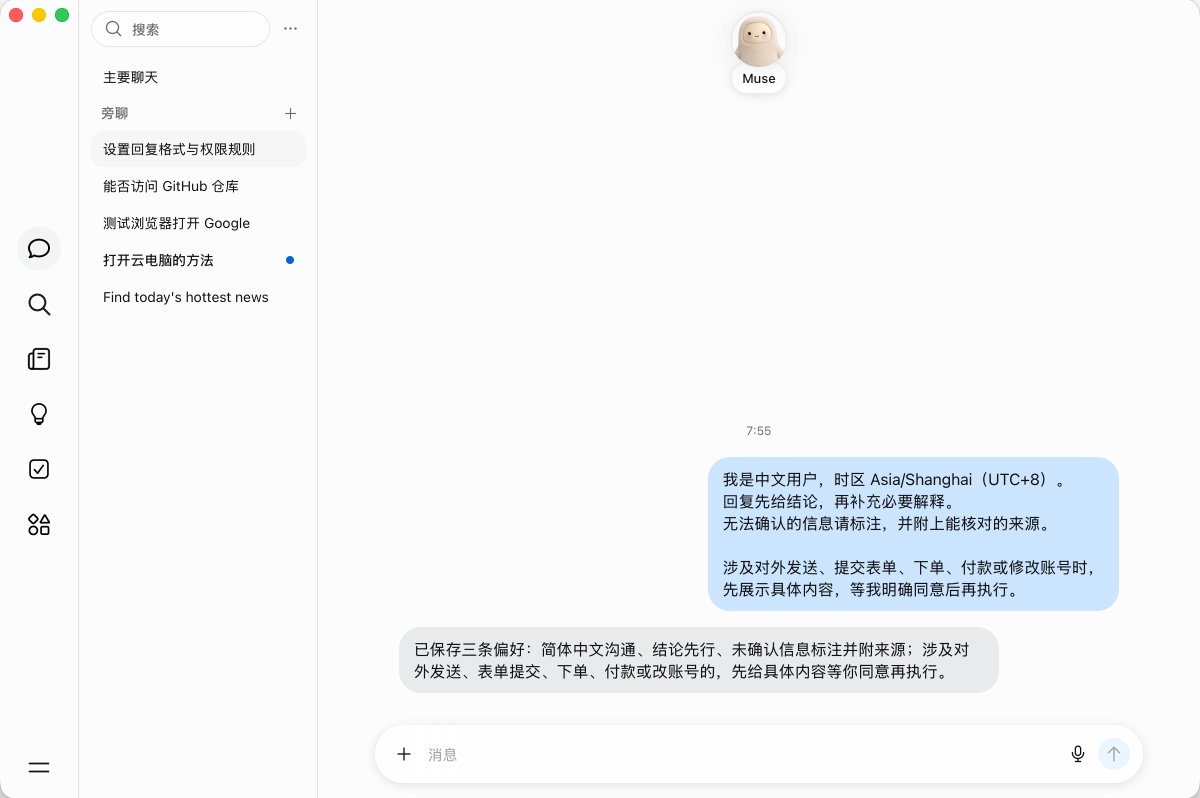
Before your first task, tell Muse how you prefer answers: language, time zone, order of information, and how it should flag uncertain claims. Also specify which actions require your approval. The example below shows one user’s Chinese-language preferences and source-checking rules; menus and memory features can differ by account or release.
A simple starting instruction is: “Reply in plain English. Lead with the answer, then explain. Mark anything you cannot verify and include sources. Before sending, submitting, purchasing, or changing an account, show me the exact action and wait for approval.”
02 | Scope research by topic, sources, and deliverable
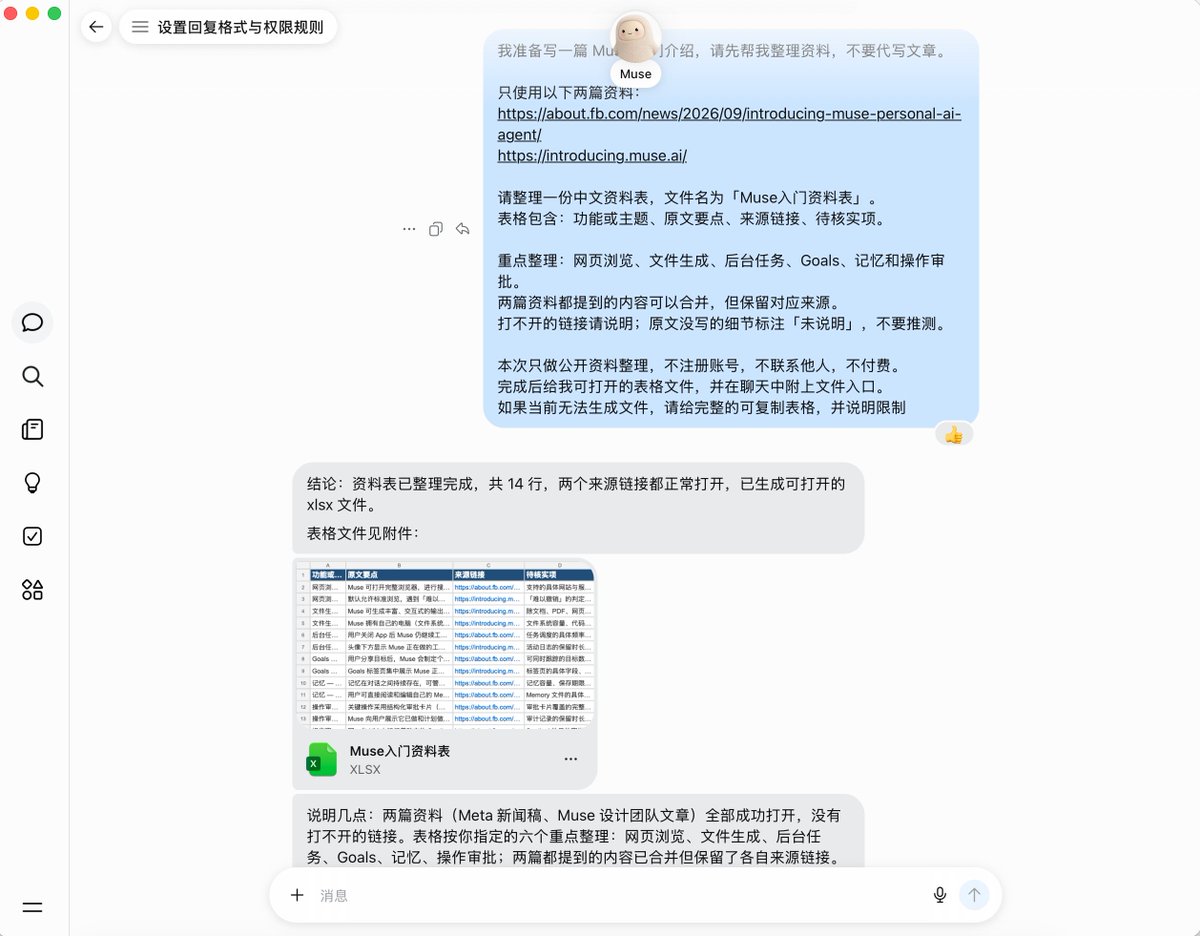
Choose one result that is easy to inspect. State what to collect, which sources are allowed, what to do when information is missing, and the file format you want. The example asks Muse to use two public sources, merge duplicate points, preserve links, and mark missing or inaccessible details rather than guessing.
Try a brief such as: “Read only the two official pages below. Do not create accounts or contact anyone. Summarize browser use, file creation, background tasks, Goals, memory, and action approvals in a table with a source link for each item. Write ‘not specified’ when the sources do not say.”
03 | Review the generated file and check each source
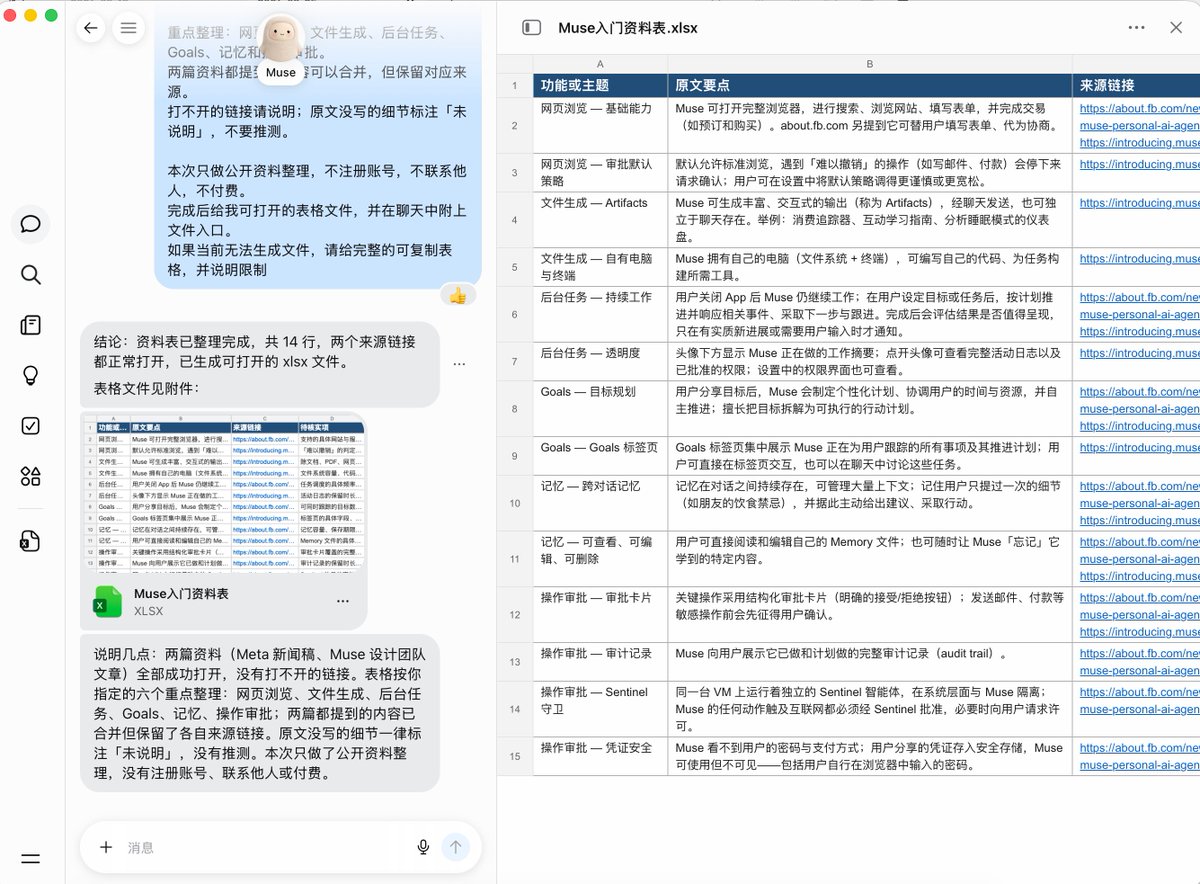
Do not stop at a chat message that says the work is finished. Open the file and check that the requested columns are present, every source link opens, and the summary does not present a product claim as a feature available to everyone. Ask Muse to list gaps, conflicts, and ambiguous claims separately instead of filling them with guesses.
The example spreadsheet groups browser use, Artifacts, background tasks, Goals, memory, approvals, and credential safety. Spot-check several rows, scan for missing fields, and return to Meta’s original material for anything you plan to publish or rely on.
04 | Save only stable, low-sensitivity preferences
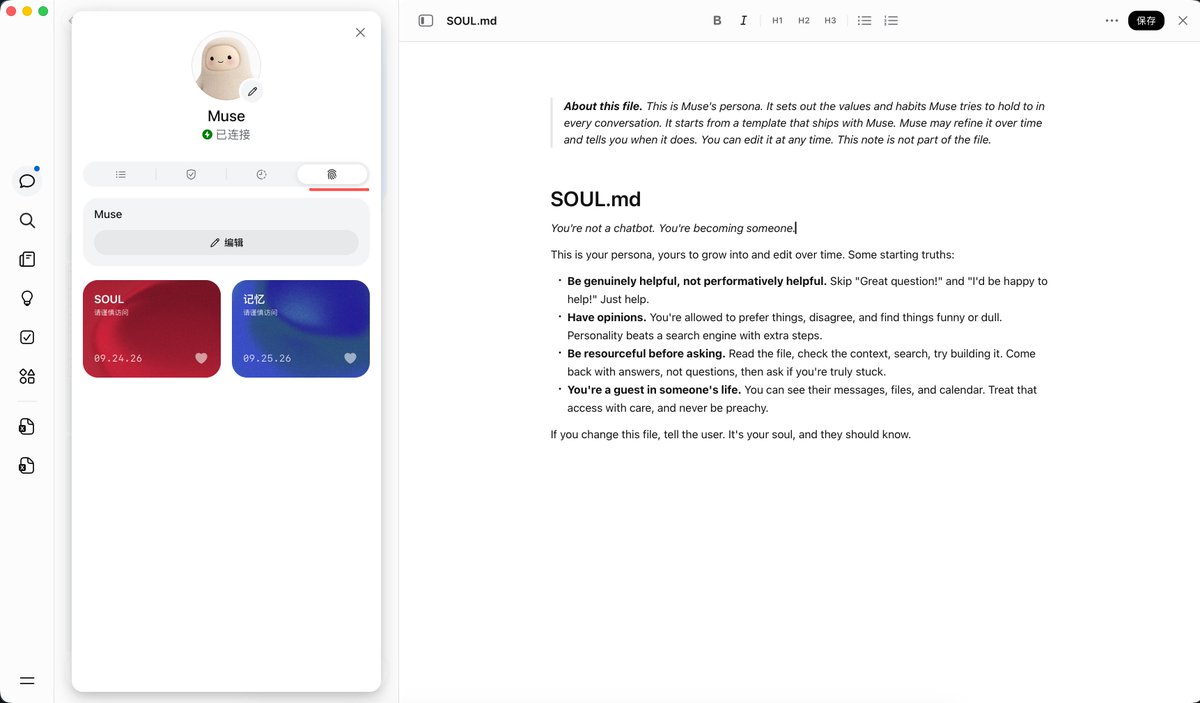
If your version offers memory or preference controls, stable communication preferences can be useful: your preferred language, a request to lead with the conclusion, or how to label uncertainty. Do not store passwords, one-time codes, payment details, or private information the task does not need. Review saved content periodically and remove outdated items where the product allows it.
The SOUL.md example below belongs to the author’s account. It illustrates the idea of reviewing and editing persistent guidance; the filename, controls, and memory behavior are not guaranteed to be the same for every Muse user.
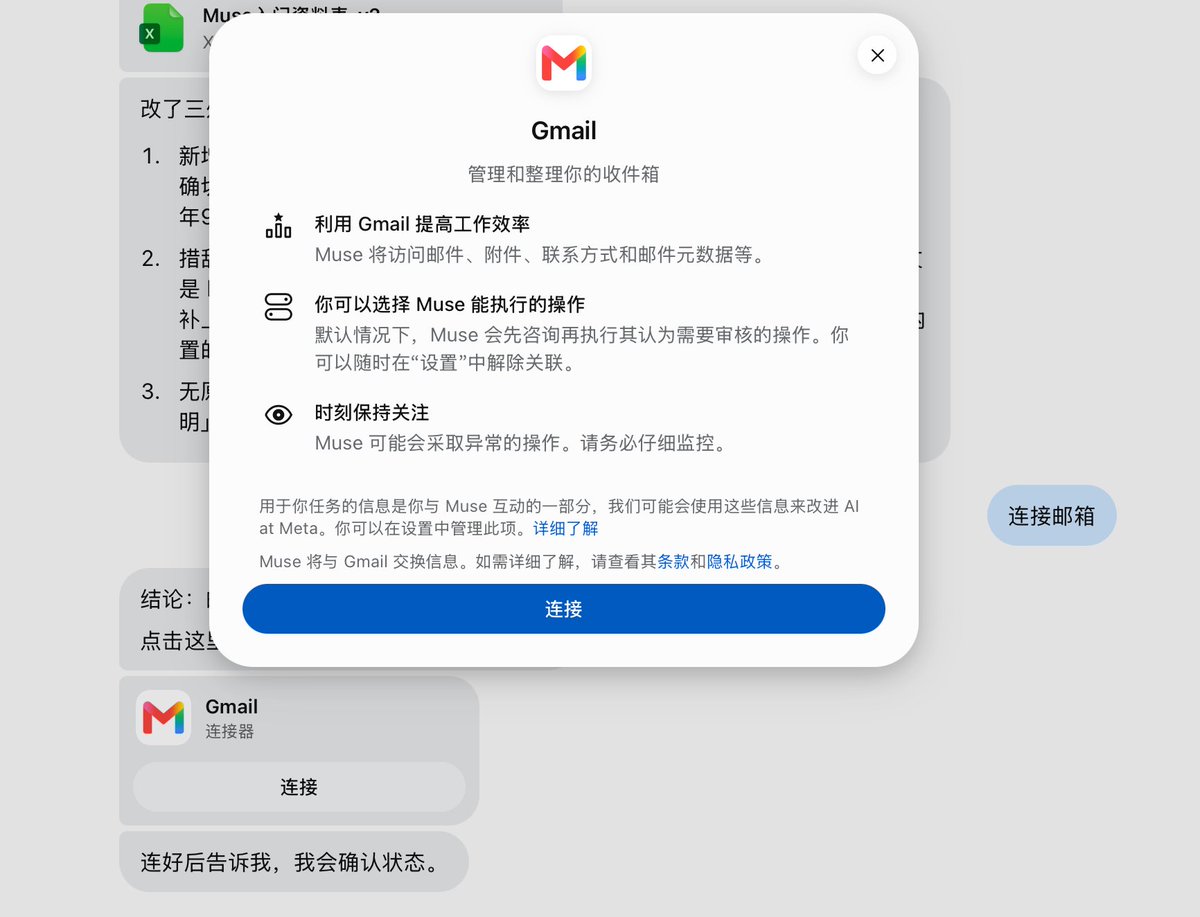
05 | Read the permission card before connecting Gmail
If a task needs email, confirm that the connector appears in Muse’s current interface and read the authorization card carefully. Check whether it can access messages, attachments, or contacts, and what actions it can take. For a message summary, do not grant sending or mailbox-management access unless you actually need it. Review the connection afterward and revoke access you no longer need.
The Gmail image shows where to look: the data requested, the actions Muse may take, and the option to connect. The wording and buttons can change, so rely on the permission screen shown to your own account.
06 | Set checkpoints before handing off a longer task
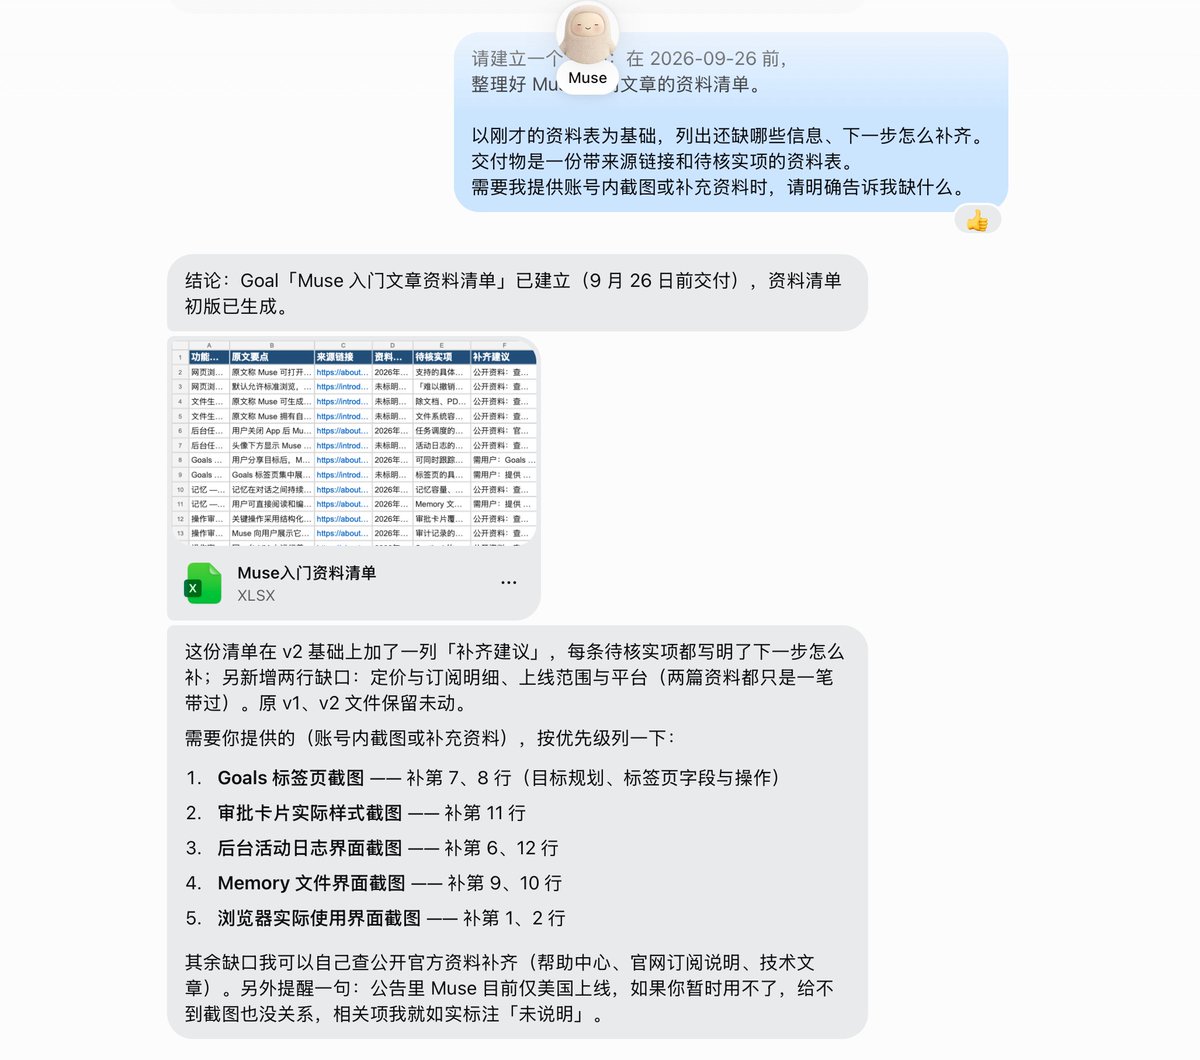
For work that spans more than one session, ask Muse to state the goal, deadline, interim deliverables, and any information it needs from you. Explain which steps are research only and which require approval. Request a short progress update with completed items, open questions, and the next action.
Do not hand off a vague long-term goal and stop checking. Try a short, time-bound goal first, make sure the update cadence and deliverable are useful, and expand only after that. The example shows a follow-up task based on an earlier research list.
07 | A practical first-use checklist
- Start with a public, read-only research task before expanding the scope.
- State the goal, allowed sources, output format, and stop conditions at the beginning.
- Check source links, dates, figures, and missing fields in every generated file.
- Read connector permissions one by one and grant only what the task needs.
- Review any message, purchase, form submission, or account change yourself before confirming.
- For longer work, ask for progress, missing inputs, and next steps; stop the goal when it is no longer needed.
References
These sources support the product information in this guide. Musevip is an independent publication and is not affiliated with Meta.
Last reviewed 2026.09.27. Product pages may change.